Wednesday, November 4, 2015

Hogwarts House Robes


Growing Up


Growing up as a kid I used to love dressing up for Halloween. I think I enjoyed dressing up more than the candy, maybe not much more but then the candy. It can be really fun to dress up and pretend to really let your imagination carry you away. I remember the day when I was a kid and it became uncool to still be pretending and using my imagination.  Then again when I was older I remember the Halloween when many people asked me “Aren’t you too old to be trick or treating” (I was 12)   Again at other times having more and more opportunities for expressing my imagination being unacceptable socially as I continued to get older.

As I have watched my own children now discuss for a couple of months what they wanted to be for Halloween I have started to wonder, at what age will society start repressing their imagination? Is it a good thing for society to tell a person when they have to set aside their imagination?? When does a person really need to start growing up? Do you really need to stop pretending, imagining, and playing to be a grown up?

How do you define what it means to be an adult? Is being an adult how many years you have been alive? Is it how many things you have accomplished? For example: a college degree, owning a home, having a credit card, having children, having a head full of grey hair and bones that ache when the weather is going to be bad? Or is being grown up more about how a person chooses to spend their time? When you have spent most of your day doing things you really don’t want to do because they have to be done, is that when you’re an adult?  My Grandma Mary once said to me “being old is a state of mind” then she jokingly talked about not being able to get her body to get in line with her mind.

Regardless of how a person decides to define what makes a person a grown up. I don’t think that a person has to give up playing, imagining or pretending. Here is why I say that. Our “Future Author” plays really hard on her recesses and then works really hard in class from what her teachers have told me.  No “Future Author” is not an adult by age or actions yet.

However, the day after Halloween she was talking about how this Halloween was the best day ever and one of the best days of her life. Using this kind of exaggeration, as some might call it, is pretty normal for a kid her age. Her comments and attitude got me thinking about why she says these kinds of things.  Then it hit me that she says that because she lets herself enjoy her life. If something remotely good, or fun is going on she is going to let herself not only enjoy it but make the most of it. 

I think that what many of us “adults” are missing is this attitude of gratitude for the fun, silly, imagination possibilities in our lives.  I can sometime confuse setting aside childish things and child-like things. For example, I can be so focused on my never ending list of things that need to be done that I don’t take the time to enjoy that cloud that looks like a turtle I am driving by. I am not saying you should not watch the road when driving, look at it on a red light. Or taking the time to laugh at a video of chickens clucking that made one of my kids laugh so hard last night that she fell on the ground laughing.

I think Halloween can be a very fun holiday for the whole family. It’s a chance to set aside being so serious all the time and just play and pretend with my kids.


This year our family went as Hogwarts students and professors.  It was really fun to watch our kids pretend to shoot spells at each other and for my husband and I to award house points to them depending on what they did.

Here is how we made the cloaks for each kid.

Step# 1
Measured across the shoulders then added 2 inches to that length. This measurement was used to create how wide to make the shoulders.

Step#2

Then we took the distance from shoulder to shoulder +2 inches and * it by 2 for the length across of the bottom of the cloaks.

Step#3
We then measured from the top of their shoulders to their feet and added 2 inches. For how long to make the cloaks.

Step#4
 
We then took the length for what would be the bottom of the cloak and the length that would be the height of the cloak and made a rectangle this size on newspaper.

Step#5

We cut out this rectangle.

Step#6


We then folded the newspaper pattern in half. The fold was so that it made an even narrower rectangle.

Step#7
I then marked where the middle of the folded news paper was in red pen.

Step#8

("Spiderman Jr. took these. He was very helpful)
I then took the measurement for across the shoulders and divided that number in half. From the red mark I measured out the divided number in both directions. Then marked where these measurements ended with red pen.

Step#9


From the measured out shoulder distance on the pattern I took one of that kids sweaters and folded the sleeve so that I could copy the curve of the armpit hole. I then traced the armpit holes onto the paper on both sides of the drawn shoulders.

Step#10
From the bottom of each of the armpit holes I drew with a ruler a line to the nearest bottom outside edge of the back of the cloak.

Step#11
I then cut the back of the cloak pattern we had created out.

Step#12
I took the same sweater and a new piece of newspaper and traced the armpit holes on the paper.

Step#13

I then measure the distance from the edge of my kid’s shoulders to the tips of their fingers.  With this measurement I drew a straight line with a red pen from the top of the armpit hole till I had reached the length I had measured for the arm.

Step#14
Next I started from the bottom of the armpit hole and drew a line with red pen that was sloped down. I did this so that the sleeve would have a larger opening.

Step#15
I then drew a line connecting the two ends of the lines I had drawn for the arm length.

Step#16
I then cut out the pattern I had just made for the sleeves. I planned to cut the fabric with one side on a fold.

Step#17

("Spiderman Jr. took this one)
I then took the back of the cloak pattern I had made and pinned it to the lining fabric which I had folded over so that I would be cutting two of the back from the lining material.

Step#18


("Spiderman Jr. took this one)
I cut out the back of the cloak.

Step#19
I then took the pattern for the back and folded it in half length wise again.

Step#20
I took 1 of the cloak backs I had just cut and folded it in half length wise as well.

Step#21
I pinned the pattern to the 1 cloak back I had folded in half. Then I folded over at the top the inside edge of the pattern, people do when they doggy ear a page in a book and pinned this down.  The triangle was acute in its angles.

Step#22
("Spiderman Jr. took this one)

I then cut along the lining fabric where I had created this acute triangle then continued to cut along the folded edge of the cloak back lining.  Now changing this 1 piece of lining from a back piece into the 2 front lining pieces of the cloak.

Step#23

Next I pinned the sleeve pattern to the folded lining material making sure that what would become the top of the sleeve was along a fold when pinning.

Step#24
I then cut out the sleeves. Making sure to leave the top of the sleeve that was on the fold uncut.

Step#25


I repeated steps 17-24 for the top fabric I was using.

Step#26 

I surged all the fabric i had cut.

Step#26


I pinned together the right sides of the lining only at the top where the tops of the shoulders would go for the front and back of the cloak lining.  Then stitched these together.

Step#27
I then opened up the sleeves I had cut out and I opened up the front and back of the cloak I had just sewn together.

Step#28
I then took on the sleeve where the armpit would be located and matched it up to where the armpit would be located on the cloak. I then pinned the right sides together. I did this for both sleeves.

Step#29
I then sewed the sleeves onto the cloak. After this the cloak was still able to lay flat and open.

Step#30
I then took the sleeves and matched up the sleeves for pinning and continued pinning all the way down the sides of the cloak.

Step#31
I then sewed the sleeves and along the sides of the cloak in one long line. I repeated this for the other side.

Step#32- The hood
To make the hood I measured how the length from the highest point of my kids head to the lowest part of their necks.  This measurement determined the height for the pieces that would make the hood.                                          I then took my measuring tape and measured the distance from the bottom of the acute triangle I had cut on the front side of the lining then continuing up the slope and around where the neck would be and still continuing to the other side stopping when I had reached the bottom of the other acute triangle on the other side of the front lining.  I took this measurement and divided it in half then I added 2 inches for seam allowance. I then created a rectangle with the two measurements for the pattern for the hood on newspaper and cut it out.

Step#33
Next I pinned the hood pattern to the lining fabric that I had placed with the two right sides together.

Step#34
I cut out the two hood pieces for the lining.

Step#35
I pinned the two lining pieces together only along two edges.  


Step#36
I then sewed these two sides together.

Step#37
I then opened up what is the inside lining of the hood

Step#38
I then grabbed the lining that was now the main body of the cloak. I folded the main body of the cloak material in half at the neck.  I placed the corresponding middle spot on the hood together with the lining of the cloak. Then pinned the two right sides together. Now I sewed the hood onto the cloak body.

Step#39

I repeated steps 17-38 for the top fabric.

Step#40
I matched the right sides of the lining cloak with the top fabric and then pinned them together along the edges that are the opening for the front of the cloak and along the hood but NOT along the bottom of the cloak or at the ends of the sleeves.


Step#41

I then sewed all the way along this line.

Step#42
Then I flipped everything out so that I could put the lining inside of the top fabric.

Step#43
I tucked and pinned the sleeves and bottom of the cloak so that the seams were hidden and closed up.

Step#44
I hand sewed the ends of the sleeves and the bottom of the cloak with a hidden seams.

Step#45


I repeated Steps 1-44 for our other three children.

Materials           Cost

Black fabric-donated by Grandma ”C” 0.00
Yellow cotton lining fabric-
left over from another project       0.00
Blue Satin –from the thrift store     7.00
Green cotton- from the thrift store   4.00
Red velvet- donated to us years ago  0.00
Red thread-already had              0.00
Green thread-already had             0.00
Blue thread-already had              0.00
Yellow thread-already had            0.00
Black thread-already had             0.00

Total Cost


               For all four cloaks   11.00

Wednesday, October 28, 2015

DIY Hogwarts House Points Counter

Hogwarts House Points Counter


When “Spiderman Jr.” picked Harry Potter as one of his themes for a home school unit our other children got really excited.  They have enjoyed some of the left-over’s or side effects of other themes he has picked, for example, the super hero unit.  However, this unit has had all four children anticipating its arrival for a couple of months. 

When my kids found out that Harry Potter was the next unit “Spiderman Jr.” was going to do “Soccerboy” asked if he could participate in the activities I did with his brother. I was shocked, although I probably shouldn’t have been considering his feelings on this book series.  

It wasn’t much later that same day when our girls made the same request.  I agreed to let them participate if all of their public school work was done first.
I then started thinking about how much fun it would be for our youngest to have his sibling do activities with him.  He usually has a good time with them.

Eventually my thoughts went to the House Cup and earning house points.  I thought of putting the different kids in different houses and being able to award points for the good things they do.  I started looking around at some of the DIY house points counters and there was not a lot out there.  Some looked really pretty but didn’t function.  Some would be easy to put points in and take out but didn’t look a lot like the house points counters. If it did not look like the one in the book is described it would drive them crazy, they would not be able to let it go. I could imagine them mentioning it every day and if our youngest heard this comparison then he would get fixated on it and would not be able to let it go. 

So I had to decide if it would be possible to make a house point counter and would it be worth it to make it or would I have to let the idea go?  I decided that it would be worth the work if it would increase the amount of fun our youngest would have because more fun means more learning.

I then looked at the images of the house point counter from the movie and realized that there is no slot for the points to slide through.  Why would there need to be really, it’s a world of magic.  So I knew I would have to hide any functional mechanisms I added as much as possible.  I looked through designs for machines like gum balls, coin turner etc.  I had more than one attempt before I was able to make a working model and in the end there were some appearance ideas I had to skip(like painting the frame) because I was out of time for adding them.  I hope these ideas will help you make an even better model.

Materials you will need:

12 clear soda bottles
4 large pieces of flat plastic
1 exacto knife
1 sharpie marker
1 hole punch
A spool of clear lanyard
Goo gone
1 ruler
4 brads
A drill and drill bit big enough to make a hole for the brad
Tape- electrical or duct tape (you need a strong tape)
Scrap wood
Screws
Drill bit that makes holes
Glass marbles in the four house colors


Step#1
 
I peeled the labels off 12 clear soda bottles.  Then used some homemade goo gone to take as much of the label glue off as I could.

Step#2


I took a yellow sharpie marker and drew a line around the bottom of the soda bottles where it changes from flat to a slightly bubbled curve on all 12 soda bottles.

Step#3
 
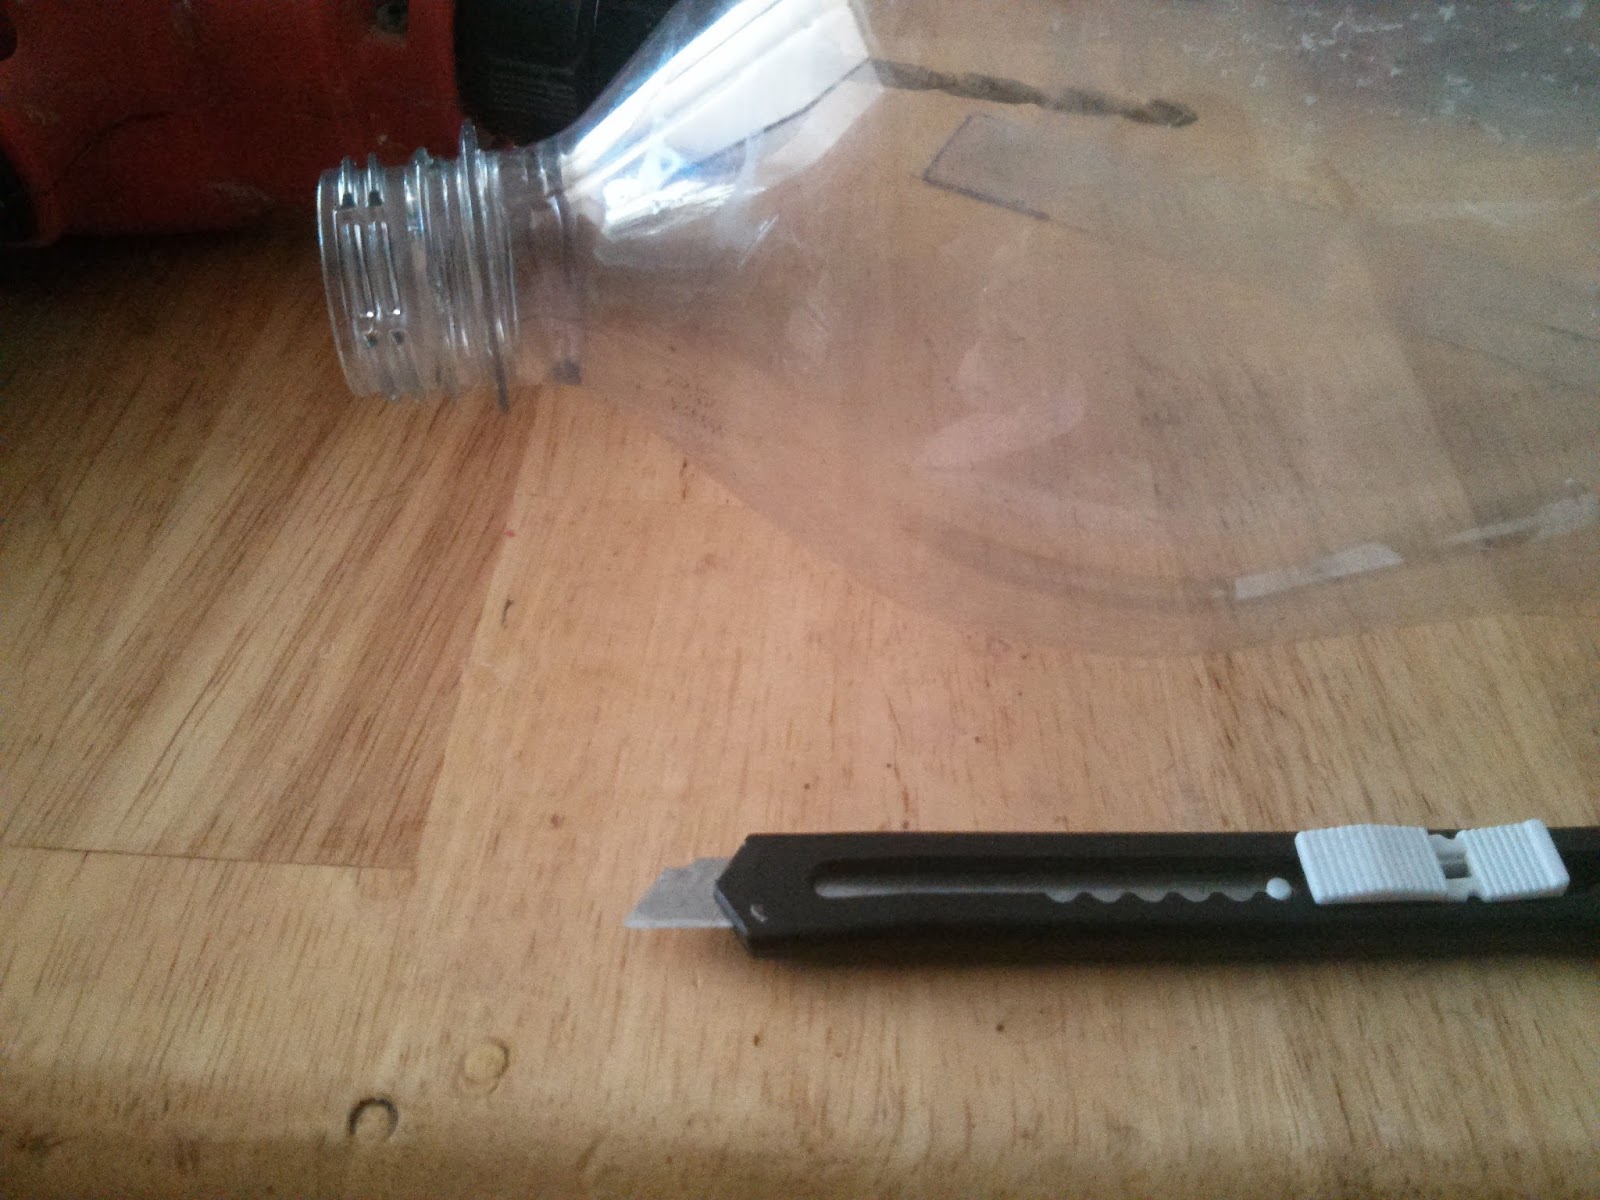
I took an exacto knife and cut along the line I had drawn.  Some tips about cutting: lightly cut along the line first then slowly follow this line many times. I slipped with the exacto knife a couple of times and then had a crooked line so I had to clean more bottles.

Step#4
 
I then took clear plastic from strawberry cartons and other plastic items that had been purchased and cut a rectangular shape out of them.  The rectangle was just wide enough to cover the hole that the soda would pour out of but also not so wide that it would not slide easily up and down the slope of the soda bottle on the inside. Cut four of these.

Step#5
I took the soda bottle and set the hole that the soda would pour out of and traced around the hole. I made sure that the circle was in the middle of the rectangle I had cut. Then cut out this circle from each of the four rectangles.

Step#6
I then drew with the sharpie a line to the left of the circle I had just cut. The line went from near the circle and close to the edge of the rectangle. Cutting and strength tip: leave enough room in between the circle and the end of the rectangle or the brad you will be putting in will rip through the plastic or the weight of the marbles will rip through it as you use this pulling device.  Also again cut gently the first time and slowly after or you will go crooked or cut something you don’t mean to. After you cut this line widen this cut line just big enough to have the brad slide through it back and forth. Do this to all four rectangles.

Step#7
Take the bottom end of your soda bottle and cut a slit (do not widen this) along the curve of the bottle. The cut is a little wider than your plastic rectangle piece. Do not go too low on the bottle because this mechanism does not work if you do.  You are trying to have the slit high enough that the plastic rectangles that will slide through the slit you make go down and then back up the bottle when it crosses to the other side of the bottle. (Again cut slowly and gently, you would think I would have learned the first few times)Do this to four soda bottles.

Step#8
 
Slide the rectangle through the slit. Make sure you put the side that has the hole and the slit you cut through the slit in the bottle first. Slide the rectangle far enough into your bottle so that it is touching the other side of the bottle. The two pieces of plastic should look like two pieces of sandwich bread on top of each other but vertical. There should be some of the rectangle hanging out of the opposite side of the bottle.

Step#9

Turn the bottle around to look directly at the two pieces of plastic that are touching vertically. Look at the bottom of the slit you cut in the rectangle that is inside of the bottle. This should also be the closest part of the slit to the circle you have cut.  Take your sharpie marker and put a dot on the outside of the soda bottle where the bottom of this slit is.  Now drill a hole where you have marked.

Step#10
 
Take a brad and on the inside of the soda bottle you slide it through the slit in the rectangle and then right through the hole you have drilled in the bottle. Now on the outside of the bottle open up the brad on both sides. Check to make sure that the plastic rectangle slides up and down the inside of the bottle by pulling on the end of the rectangle that is sticking out of the bottle.

Step#11
Take two soda bottles that do not have pull tabs and match up the two cut ends together. Now take a hole punch and punch holes along the edges of the two bottles. Do your best to make the holes on the two soda bottles match up.

Step#12
Now take your clear lanyard and lace the two bottles together like you would a shoe and tie a bow.  Tying hint: lace it so that the bow or knot if you choose is at the back.

Step#13
Repeat steps 11 & 12 for six other bottles. You should have four laced together tubes total when you are done.

Step#14
Now take one laced together tube and one of the soda bottles with a tab. Line up two pouring ends together. Alignment hint: make sure the pull tab is in the front and on top. Also make sure the bow or knot you tied is on the back when you are lining the two pouring ends together. Now tape the two pouring ends together thoroughly. Repeat this step with the other bottles.

Step#15
I took some scrap lumber and laid the house counters next to the scrap wood to see how long the wood would need to be.  I will give the measurements I used to create the frame work to supports the counters I made. However, if I were to do it again I would take off about 4 inches from the height of the 33” pieces.
 I cut 2 pieces 33” long.
 I cut 5 pieces of wood at 22” long.

Step#16
I pre-drilled holes for joining two of the 22” pieces of wood so that they would look like the letter L. then screwed them together.  I then repeated these steps with two more 22” boards however they were facing the other way so they looked like _I  or an L in a mirror.

Step#17
I then laid the House point counters on top the L I had created for the bottom and traced with sharpie marker around where the soda cap lids would be.

Step#18
I then drilled holes large enough for the soda caps to go all the way through the wood also making sure there was enough room for me to be able to unscrew the lids so I could remove points if there was any rule breaking.

Step#19
 

I then took one of the 33” long pieces of wood and laid it on top of the L piece of wood I had just drilled holes in. I pre-drilled holes for the screws.  Then drilled the screws in place.  Then repeat this step on the other end of the 33” piece of wood, one shaped like _I on the other end.

Step#20
I then flipped over the pieces I had just put together and repeated step #19 for the other side.

Step#21

I then laid the house points counters in their holes.  I then slide the last 22” piece of wood under the counters where the bottles were taped together. Then removed the counters leaving the wood in place. This was done so I could get this board in the right place.  Marbles or glass beads are really heavy for a plastic soda bottle to hold up so I wanted to add this extra wood piece here to have an anchor for the counters to be tied to.  I then pre-drilled the holes to join this piece of wood in between the two 33” pieces of wood then screwed it all together.

Step#22

I then placed the counters back in their holes and marked on each side of the board, I had just screwed in place, so that I knew where to drill the holes. Then I drilled the holes.

Step#23

(I forgot to take a picture of this while I was making it)
I laid all the house point counters in place and threaded the holes I had drilled with weed whacker line.  As it happened I had left over line in three of the four house colors from weed whackers I had accidentally caused to melt from catching on fire. I had thrown the weed whackers away but kept the line.  I used nylon twine in the missing house color on the one I didn’t have weed whacker line for anchoring.

Step#24
(I forgot to take a picture of this while I was making it)
Now that the counters were somewhat anchored. I decided that I wanted a little more support for the top of the counters. So I drilled two holes above each of the counters and threaded weed whacker line through the holes and punched two holes in the top of each counter and tied the line through the counters to support the weight of the marbles and glass beads.

Step#25
I asked my husband to hang it on the wall and try if he could to put at least one side into some studs because I knew this was going to be really really heavy when we filled it. Thankfully it was just big enough to put both sides into studs, so it was anchored in studs at four points. Yeah for cool husbands!

Step#26
We then filled each house counter with either marbles that matched the twine and glass beads to match the weed whacker line that had anchored that counter. Counter tip: we have a couple of different sizes of glass bead and one marble. Having a variety because that is how it worked out for that color with what we had. I would do it with marbles only if I could. They work the easiest. Sometimes a bead will get stuck and we have to move it around with a chop stick from the top and this never happens with the marbles.
As each kid has had triumphs or broken rules they have gotten points or lost them.  It had been really fun to see them get excited as they get points.  We have not awarded our house cup yet. We are thinking about letting this completion go beyond the unit till the end of the school year since the whole family is having so much fun with it.

Materials

12 clear soda bottles- already had                               0.00
4 large pieces of flat plastic- already had                        0.00
1 exacto knife- already had                                     0.00
1 sharpie marker- already had                                   0.00
1 hole punch- already had                                       0.00
A spool of clear lanyard- already had                             0.00
Goo gone- already had                                          0.00
1 ruler- already had                                             0.00
4 brads- already had                                            0.00
A drill and drill bit big enough to make a hole for the brad-         6.00
Tape- electrical or duct tape (you need a strong tape) - already had 0.00
Scrap wood- already had                                         0.00
Screws- already had                                             0.00
Drill bit that makes holes- already had                            0.00
Glass bead and marbles-                                         15.00

Total Cost


                                      21.00