Tuesday, December 8, 2015

DIY Swim Lap Counter

Swim Lap Counter
Where I swim there is a 100 mile club.  Each swimmer who chooses to participate enters the number of laps they have done on the day they have done them. To the best of my knowledge I am at 39 miles. 

I don’t have a 100% accurate count because I am thinking about other things when I swim like my husband, my children, projects, or things I am working on changing about myself.  I am not competing any more so it’s ok to not be mentally engaged the whole time.

I originally joined the 100 mile club just to see how many miles I could get in the time they set to do it in.  However, after a little bit I noticed that my kids were paying attention to how many miles I swam each day and how close I am to the 100 mile goal.

It hit me that this could be the chance I had been longing for; a chance to show my kids that doing things that are hard physically can be done.  Some of my children have a tendency to hold themselves back when things get hard.  I have longed for a chance to set an example of how to try your best in a sport but I have not known how to do this since my competitive days are over. I don’t want to take the time away from my family that it would take to try to be competitive again in any of the sports I used to do.  I am a mom and that is what I want to do with my life, I’m happy. How could I set an example and still be a Mom? This 100 mile club I hope will be this opportunity.

With these thoughts in mind I have decided I need an accurate count of the laps I am actually swimming.  I couldn’t take it casually anymore. I knew I was short of the miles I had actually done but there was nothing to be done about that now. Here is the counter I made to help me keep track.

Materials
15 Index cards
Marker
Lamination sheets
Scissors
Hole punch
Three ring binder
Step#1
 

I counted out 15 index cards and folded them in half. I cut the index cards in half and then separated them into even stacks of 10 cards.

Step#2

I wrote the numbers 0-9 on each stack of cut cards.

Step#3
I punched holes in the middle of the top of all the cards.

Step#4
I laminated the cards and cut them out.

Step#4
Next I punched holes in the place where I had punched holes before laminating.

Step#5

I placed the cards on the rings

Step#6
Trying the Counter Out

When I took the binder to the pool it worked very well. I flipped a card as soon as I hit the wall and didn’t have to worry about losing track.  I counted 12 more laps than I had the previous day in the same amount of time. There is no way I dropped that much time in one day. I don’t know if this will work as the example I am hoping for with my children but it can’t hurt to try.

Materials                    Cost

15 Index cards-Already had    0.00
Marker-Already had           0.00
Lamination sheets-Already had 0.00
Scissors-Already had          0.00
Hole punch-Already had        0.00
Three ring binder-Already had  0.00

Total Cost


                              0.00

Thursday, December 3, 2015

Why Seam Rip?

Why Seam Rip?
Why does a person need a seam ripper? Simply put, to rip apart a stitched seam.  Usually a person needs a seam ripper when they have made some sort of mistake in what they are sewing.

I have read on line that some prefer not to seam rip, instead they cut new pieces and sew it again.  This is not my preference because it is cheaper for me to buy more thread if I have to seam rip apart something rather than purchase new fabric. Also, what happens if you went back to the store and the store was out of your material? I suppose you would then look on-line for more of that fabric somewhere else.  However, if the fabric was from a different dye lot it would drive me crazy. What if you can’t find more of that material anywhere? Your next option would be to have someone recreate that same material but I have no clue how much that would cost.  It seems far easier to me to just spend a few minutes and rip apart the seams.

I use seam rippers not just on my mistakes but when I am taking apart an item of clothing, curtains, bag etc that I want the material from that has some sort of damage on it.  Damage like a stain, worn section, rip in the bag or curtain.  When I do this I have only a certain amount of material to work with and I want every bit of material I can get.

   
I also use a seam ripper when taking apart sheets. Why would I take apart sheets? Sometimes it is the cheapest way to get the backing for a quilt.  Or if I want to avoid a seam in the back of a quilt or a cloak then a sheet is such a large continuous amount of fabric is how I can get the look I want for a lot cheaper.
   
Another reason I seam rip things is to get notions. For example, if one of my kids out grows a pair of pajama pants.  I don’t get rid of it and I unfortunately can’t give it away( to many stains) but I can repurpose the cotton into socks, rag rugs etc. and I can repurpose the elastic in the waist band into a headband for my girls or any number of things.
                                        
                                   
There are also alterations to consider. I looked everywhere years ago for a wedding dress that looked good on me and couldn’t find one.  Eventually I found one that was close but that needed alterations to be modest.  So I seam ripped the top apart, added in other material and changed the design of the top (finding a matching material was insanely difficult) so that it was modest. I was confident in what I was wearing that day.

There are times I won’t seam rip material to get a few extra inches of fabric.  Jean/Denim for example is so hard to rip the stitches out of that I don’t find it worth the ache in my hands. However, I only came to that point when I had so much used jeans given to me that I could cut around the seams and not cause myself to be short on what I needed. 

A seam ripper is definably a work horse in my house. It costs fewer than 2.00 for this tool and it saves me so much money.  Seam rippers have been around a long time; the earliest version I can find of this devise is from 1899. There have been several improvements over the years from different inventors. It’s been around for about 116 years. However, if you don’t have one of these gadgets just use the older work horse, scissors. 


Tuesday, December 1, 2015

Reupholstering and Refinishing a Chair

A Very Merry Un-Birthday


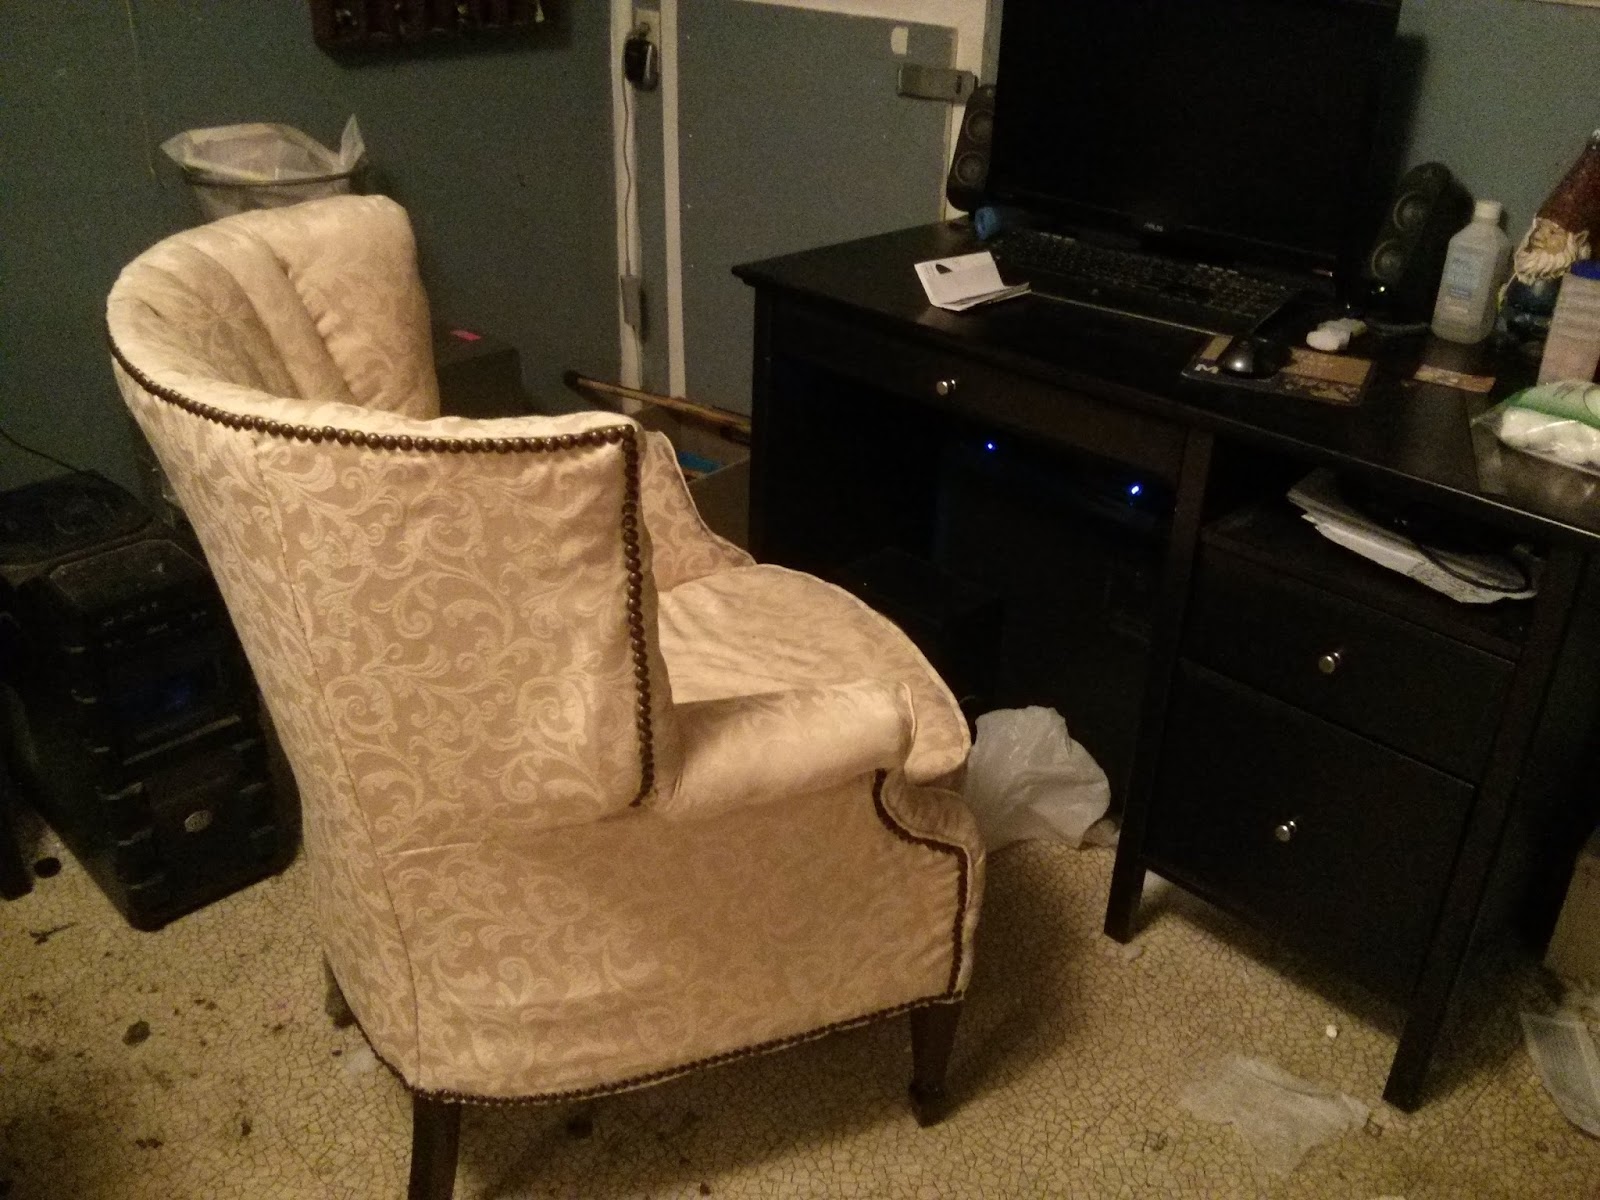
Several years plus two months to the day after my husband’s birthday I finished his birthday present. A chair I refinished & reupholstered for him. 


Several years ago I picked up a chair for free that someone had meant to reupholster. The chair had been in their garage for many years when they decided that they were never going to reupholster it; they just needed to get it out of their garage.
                   
I leapt at the chance to refinish and reupholster it. I love old furniture if it is from before a certain date because it has the potential to be very comfortable.
   
We had this antique couch I had refinished & reupholstered that was very comfortable. Friends who came over and sat on it would say that it was so comfortable that they really didn’t want to get up.  So when I saw a chair that looked like it was of the same quality I was really excited.
   
It took years to finish this project and here is why it took so long.  To refinish and or reupholster and often repair structural problems in old furniture can be expensive and time consuming to do it properly.  For example to properly clear the frame of all the tacks, nails, hardware and the odd occasional screw from the frame can take a bit of time. Every single step takes time if you let everything take its proper time.

People who reupholster or refinish furniture for a living can do this more quickly because of their experience and extra tools they have for helping with the process.  A person could ask, why on earth would you spend this much time and money to fix a piece of furniture when you can buy a new couch for less. I would answer as follows: Can you repair that new couch if it gets broken? Can it hold up to a child jumping on it? Mine can, not that I am going to tell them that. Is your furniture comfortable enough that you could in theory lounge on it all day or does it get uncomfortable after a while to sit or lay on it?
As to the finical investment, I spend less money in the long run. Here is why; if the fabric on my furniture is ruined beyond cleaning I just have to buy more fabric and change it out.  The guts of the furniture are still good. I can change out the fabric for under 100.00(with my preference in fabrics) that is a lot cheaper than a new couch. Buying new couches adds up over a person’s life span. How many couches do you think a family can go through in their life? More than one I am sure. 
Then I would talk about how comfortable the furniture is. I would end my explanation by having them sit on a piece of old furniture. Maybe I would convince them, maybe not but it really boils down to old furniture being my preference.
 
This chair took so long to finish because I refuse to buy something when we don’t have the money to do so.  We don’t buy things with credit cards.  We are willing for things to take a long time to avoid debt as much as possible.  So we bought the stuff to refinish the legs over a few months.  A few more months later we bought the fabric for the chair when it was on sale and we had a good coupon on the fabric.  A month later we bought the upholstery tacks.  Then life happened and it got put on hold.  Still later we got the badding and stuffing for free from a couch I tore apart.  Months after that it was the upholstery tacks.   Another month later it was the upholstery thread and then it was the foam for the chair.  Weeks later it was the upholstery needles for stitching. 
Yes, this took a long time but the chair is finally done and I have the comfort of knowing I didn’t spend money we didn’t have for this chair.  My husband has enjoyed the comfort of sitting at his computer at home and being comfortable.  He says
“I wish I could use this chair at work.”

The idea of waiting and buying things as you can afford them is not new.  It is an old timer’s habit, think of your grandparents or great grandparents. To not spend money you don’t have, to be willing to let things take the time they need to take to work themselves out is the wisdom of old timers.  I hope I can develop this habit of theirs.  It can be a very hard thing to do things this way, being patient.  Sometimes I just want to finish a project, to be done with it.  I think obtaining patience will be a lifelong pursuit of mine.


Materials                               Cost

Upholstery Fabric-                       63.00
Upholstery thread-                        3.00
Sandpaper-                               1.00
Wood stain-                              5.00
Wood filler – left over from another project 0.00
Upholstery tacks-                        16.00
Badding- left over from another project     0.00
Stuffing- left over from another project     0.00
Chair foam-                              25.00
Upholstery needles                       5.00

Total Cost


                                        118.00

Wednesday, November 25, 2015

Making a Head band Out of Scrap Materials

Making a Head band
Out of
Scrap Materials

What’s great about making headbands is that it doesn’t take a lot of material.  A person can take what would otherwise be a useless amount of material and turn it into something useful.

For example, when I took apart my daughters halter top dress to change into a skirt I was left with the halter top afterwards. What can a person do with so little fabric?
                                    
One thing you could do is make matching headband for the skirt.  It came from the same source so it already coordinates perfectly. I also had elastic left over from when I took the dress apart so I didn’t even need to buy any. Here are two videos of the two types of headbands I made from the halter top.

Headband Type #1

Headband Type #2


Finished Headbands for 
"Future Author" and "Little Fish"


Materials Cost

Elastic- came from the dress I changed into a skirt 0.00
Fabric-left over halter top               0.00
Thread- left over from another project       0.00

Total Cost


3 matching headbands             0.00