Showing posts with label Gardening. Show all posts

Saturday, January 29, 2022

Alternative plant poles

I love gardening! It's exciting to watch a plant sprout and gain strength. My family loves eating the fruits and vegetables more them watching them grow. The down side to gardening is the expense.  A few dollars here and a few dollars there and there is only so much money to go around. 

Last fall I was planting peas and wondering how I was going to stake them? I was out of poles for the peas to climb. As I was thinking about this need I was looking at our yard and I noticed some of our flowers. We have these plants that have long stems that bloom flowers all along the stem and I thought those stems are as straight as dowels you buy at the store.

 I started wondering if I cut these stems off the plant after they were done flowering if they would be strong enough for a plant to train or curl up them. What did I have to loose, cutting off the stems wouldn't hurt the plant and if it worked I would have the poles I needed for free.

So we took our tree lopper and cut a whole bunch of these stems after they were done flowering and laid them flat to dry. It took about a month and a half . And sure enough the heavier stems were sturdy enough to use as poles for the plants to climb up. Now I don't have to keep buying these. I can just cut and dry them out every year and I will always have plenty of poles for our plants without spending any money on it.

Step#1
Cut stem after all flowering has stopped and lay on a flat dry surface to dry out.

Step#2
Wait till it is completely dry.

Step#3
Stake the plants you need and watch them climb.


Saturday, August 1, 2020

Can you grow celery stalks from a store stalk?

The short answer is yes, you can regrow celery from the store. I wanted to try this because my family eats celery every week and all the videos and blogs I read said it could be done so I thought it would be worth a try. I have been experimenting with growing celery from the store for about 7 months now and thought it would be worth sharing my observations because I couldn’t find any videos or blogs that followed the process until they got tall enough to cut to eat. Most blogs and videos just tracked it long enough to see that it sprouted. So if you are interested in trying this here are some things you might want to know to increase your rate of success.


·        Do not use a clear container to start the celery in.

*        I noticed that the plant roots do not grow as thick or as long as those grown in semi opaque containers. The darker the container the healthier the roots grew. My theory is because the roots are not being exposed to sunlight is more like nature is designed to function with the roots hidden from the sun.

*        Absolutely start it in water but make sure the container blocks light where the plant is in water.

·        Change the water daily.

*        I tried a number of day variables for how often you need to change the water.

*         Every other day is okay but the plant is weaker than if you change the water every day.

*        Anything beyond changing the water every other day and the celery will get moldy.

·        Use cool water for the plant.

*        I tried by accident hot water a few times and the celery always died shortly after this mistake.

·        Roots take on average 2 weeks to grow.

*        In many of the videos and posts I read they said to plant it in soil after a few days. When I tried this and 100% of the celery I planted after only 3 days died.

*         Planting after 1 week in water had 100% failure rate as well.

*         On average it took me 2 weeks for roots to start growing. Wait 7 days after roots that are 1" in length have grown before you plant in soil. My success rate after waiting this long was 25% survived the transplant.

·        Don't peel off all the dried outer stalks right away.

*        I tried pulling them all off at first and the plant was too week to handle the exposure to sun in my window sill and died.

*        I tried leaving all the outer stalks on and it stunted the growth.

*        What I tried that was the most successful was pulling the dried out outer stalks only a few at time then waiting a week and a half apart. By the time I had pulled off all the outer stalks that didn't regrow the inner part had gained enough strength to handle the sun exposure.

·        It takes months to grow celery as tall as the store.

*        I have not seen any videos or blogs that talk about how long this takes. I started one in January and it was not tall enough to harvest until May.

·        It doesn't grow as thick as the store without plant food or fertilizer.

*        Of all the stalks all grew as tall as store celery again. None/0% grew as thick as the store without fertilizer.

·        Celery needs loose soil and room to grow.

*        If you use a container to grow your celery then it will need loose soil and room to grow or the growth will be stunted. Meaning thinner stalks and less of them.

·        Grow your celery stalks outdoors if you can.


*        I had a 75% failure rate of re-growing celery indoors. My family eats at least 1 stalk of celery a week from the store. I tried to grow every single stalk that came home into another plant. Part of the failure rate I had is explained from all the things I learned the hard way about the conditions celery doesn't like to grow in. Near the end of my experimenting my success rate went up.

*        When I grew celery outside they were taller, thicker and much darker green.100% of those grown outside survived, even with a little bit of neglect once established.


Hope this helps you have more success re-growing celery.


Thursday, January 7, 2016

Why 3 Smaller Compost Bins

Why 3 Smaller Compost Bins

Several years ago I built our family one very large compost bin out of old pallets. It took us about a year to really fill it. Within that year I noticed some problems with the design I used.


This is not the one I built. My phone ate that one but it is almost 
exactly the same as what I built. the only difference is that I didn't 
use cinder blocks at the bottom.

Problem #1 Bulging Sides

I did NOT add a cross bar at the top to help add structural strength. It didn’t even occur to me that I would need it. It was a big mistake and here is why. As we filled in more and more compost the sides would bow. If that doesn’t make sense picture a flower opening its petal; very pretty in a flower and it slowly broke the structure of our compost bin.  This led to other problems.

If you are considering building a compost bin I highly recommend you pick a design that has a cross bar in the front so that the frame work is securely in place.  I looked around and not a lot of the designs have this feature.  I also observed these compost bins were early in their use as in the images there was almost no compost in the bins.

Yes, if you add a cross bar it makes it harder to get in there with a shovel to turn it. However, if you are willing to do the work of turning your compost to speed up decomposition than you already know you are in for a lot of hard work.  Why not kept what you built structurally sound?

Problem #2 Side effects of the bulging sides
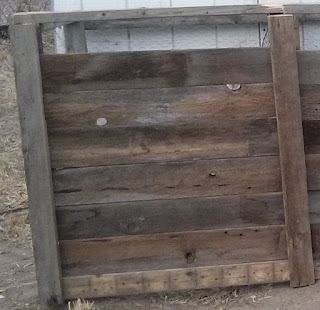
           / pallet sides

When I constructed the compost bin I used old pallets. I thought this would be good on cost since I could get them for free and the bins could get lots of air flow for help with decomposition.

Yes, there was air flow and it did help break things down. However, I discovered that as the sides bulged out, the pallet openings in between the wood slates left such a wide opening that the compost would fall out of the sides.

Problem#3 Hinged Door

I thought I was being so clever by putting a door on so that I could just have the door swing open.  Here were some problems with my design. I had the door even in height with the side walls of the bin. I did this so that no compost fell out of the bottom. However, as I filled the bin, it got harder and harder to open the door to turn the compost. When the compost got near the top third of the bin the door hinges had been stressed from pressure so much that it was leaning out like the sides were.  The bottom corner of the door had so much pressure on it that the corner had dug into the ground so hard that I could not open the door anymore.

Problem #4 Pallets are too big

In my design I used one whole pallet for each side.  This produces quite a large compost bin.  It was so large that we couldn’t do any of the things to our compost bin that help speed up the process once it was full.  It took two years for what we had put in there at the beginning to break down.

Once the compost was ready we added it into our garden soil before planting time.  We had one of our best crops that year. Our kids loved eating all the things that came out of our garden that year.

Problem#5 Only one compost bin

When I originally built our first compost bin I thought we would use what we composted really quickly so I didn’t really need more than one bin.  It took our family of six about five months to fill this large compost bin.  The problem with this is it took about one year and seven months for the compost to break down. This resulted in all the peelings, yard waste and other things that can be added to a compost bin had to go in the trash because we had no where to put them. What a waste of resources. All that waste because I didn’t have another compost bin to start using in the middle of winter when the other one was full but not ready to use.

When building what I hope will be our last compost bin for a while. I tried to look at all my design flaws from the previous one. I thought about how to prevent or solve those same problems from happening again.  I won’t say what I built is perfect. I may discover some more problems with this design. However, since I couldn’t find an old farmers advice on-line about reliable compost bins this is my next (hopefully last) try at compost bin building.

Unfortunately I don’t have pictures of all the steps. I figured out why I have been loosing pictures and it isn’t my computers fault. It was my phone destroying them while I put them on my computer. My husband decided I needed a new phone instead of using one of my families old phones when they decide to get a new one like I normally do.

Side note: it’s the expense. To have a phone that takes pictures and all the stuff I like costs so much. I start picturing all the things I could buy with that money and decide I can just use someone in the families unwanted phone again, which is probably part of why my phones only last about four or five months.

On topic again. I do have pictures of the features I hope will make for a more sound compost bin and I can explain the reasoning.


Change #1 Cross Bars for Strength


I added cross bars for strength across the top.

 I didn’t have a piece of wood that would stretch the whole length of the bins. So I had the pieces meet in the middle.

Change #2 I used Chicken wire for the sides 
for more strength and less spillage


I stapled every single small wire that came in contact with the wood for more strength to the frame work.


Chicken wire allows for even more air circulations but it has smaller holes so less should spill out. 


Change #3 I created (with my Dads help) wood slates as a “door” 

I created a slot for the pieces of wood to be slide into and out of to close in the compost and my Dad helped me cut slates that would fit in the openings. Yeah for Dads! This door will not get stuck in the ground.


Change #4 3 Smaller Bins

 If the bin gets so full that I can no longer remove the slates or they are just full than I just start using the next bin. And I won’t have to waste resources.


Materials                              Cost
Wood- 
left over from a fence I took out and a fence my Parents took out. 0.00
Screws- Gift card from family for Christmas yeah!            0.00
Chicken wire- extra my parents had                      0.00
Staples- left over from another project                      0.00
Total Cost
                                       0.00


Tuesday, November 10, 2015

Redirected Down Spout

 Redirected 
Down Spout


In our front yard we have a down spout that does not work because the ground is sloped so badly that when it rains the water doesn’t go up the concrete slab. It fills up at the back and spills over the into our driveway which results in a mini pond of ice or water in our drive way.  This can be very dangerous in the winter when its ice and it’s no fun to get out of a vehicles into a pool of water, when you don’t feel like jumping in puddles.


I have also thought about what a waste of water this little pool is just sitting in our driveway. I have thought about that many times when watering our plants.  I wish I could have all that water that spills out a few feet away from our house, if it could only be somehow poured into our garden.  I think plants thrive far better on rain water than on water from the hose.

So I looked around on-line to see if anyone else had a solution for redirecting water.  I found some really neat ideas on using rain water but nothing that fit our situation.  I did find inspiration from some people’s ideas of making what looks like a little creek bed at the bottom of a down spout.

If I could somehow make something that not only compensated for the slope in our yard/driveway but could also send the water the other way, that should prevent some dangers for our driveway and better use the water.

The project slowly evolved as we added more and more elements to make the redirection of the water more effective.

Attempt#1
We piled up a lot of dirt where the concrete slab was in an attempt to see if we could make the water run the other way when it rained.
When it rained the water did pool in the pile of dirt but then the water broke through the dirt.

Attempt#2
We decided we needed something to help hold the dirt in. So we added some wood around it.When it rained next the wood held the dirt together better but when it rained a lot the water spilled through.

Attempt#3
We took bricks we had gathered and built a damn like thing to hold the dirt. This worked even better but when the dirt got saturated enough the water slowly seeped out but it was another step in the direction we were trying to go.

Attempt#4
We cemented together the bricks. This had even less leakage. It was just along the bottom. I was again encouraged because each attempt resulted in less water in the driveway and I was closer to redirecting the water to our trees in the front.  I figured I might as well send the water to something useful.

Attempt #5


At this point I had watched some videos from the pond digger and wow do they do cool stuff. No I didn’t want a pond in my yard. However, I did learn that if I added some plastic that I would probably fix the last little bit of water leakage.  So I added some plastic we had left over from our green house. Then there was the problem of having enough rocks.  So I used the cement that was stuck around posts I had taken out of the ground when I removed our front fence. I took a sledge hammer and hit the cement till it was in smaller chunks and added my smaller rocks around it on top of the plastic. Nowhere near as pretty as the pond digger but it worked.
Attempt#6
 
This was almost what we wanted. However our down spout was not attached and the water from the gutters freely blew which ever direction the wind blew. So our latest design only worked when the water was not being blown outside of the hill we had built.  So we reattached the down spout but shortened it a little and it works very well now.  Winter is not quite here so I have not seen the advantage in no ice yet but I have seen our trees receiving the extra water that was redirected towards them.


I like this so much I am trying figure out a way to tweak this design to redirect our down spouts in the back yard to our fruit trees in the back yard. More water should hopefully mean bigger fruit.

Materials                       Cost

Dirt- already had                 0.00
Bricks-already had               0.00
Cement for bricks
-given by family who had left over 0.00
Plastic sheeting-already had       0.00
Cement chunks-from posts        0.00

Total Cost
                                0.00

Saturday, September 6, 2014

Tomato Cages from Scrap Wood

Uncaged

Walls feel like they are pressing in, a slight feeling of panic creeps up  my body and I feel the need to breath like when you are under water and you feel the need to come up for air.  For me that is what it is like when I spend all day inside away from sunlight and a fresh breeze blowing gently across my skin. 

Spending all day inside is just not good for me emotionally.  So when I got home from a meeting that had taken a little over half the day in a room with no windows I felt a pressing desire to go outside in my garden.

I didn’t have much daylight left however I was determined that I could accomplish something with the little time I had left.  I looked around after watering in our greenhouse and saw our uncaged tomatoes. “Ah ha!” I thought, I may not be able to make all the cages I need but I can make some.

We have truly been blessed with so many tomato plants that I ran out of cages; I need to make at least 20 cages.  So I determined to make at least one cage before the sun went down.

Step #1
I grabbed 4 slates from a deck that we are taking apart.  They may not work as a railing anymore but they can hold up tomato plants.

Step#2
With a pencil I marked 12 smaller sections of wood for the cross sections.

Step #3
I cut the 12 smaller cross sections of wood.

Step#4
I laid down 2 tall slates of wood. Then across the 2 slates I laid 3 smaller sections of wood.

Step#5
I screwed down the smaller sections.

Step#6
I then repeated the process for the opposite side of the cage.

Step#7
I stood the 2 sides I had built on their sides. Then laid 3 smaller sections of wood across the 2 sides.

Step#8
I screwed these 3 smaller sections down.

Step#9
I flipped over the side I had just screwed down so that it was now on the ground and the 1 unfinished side was facing up.

Step#10
I placed the last 3 smaller sections across the sides.

Step#11

I screwed down the 3 smaller sections.

Step#12
Photo
I took a rubber mallet and pounded the corners of the cage into the wet dirt.
As the sun went down I had completed two cages and I felt like I could breathe again.

Materials

Wood slates- from a broken deck  0.00
Screws- from a broken deck             0.00

Total Cost


0.00