Christmas was coming up and I wanted to make something
for my husband. I showed him some of my ideas from a Pinterest board I had
thought about making. I asked “ Are any of these things you would like?” he
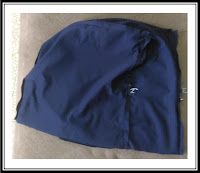
selected three items and this trash sack is one of the three he picked.
The problem I had was that trash sacks always seem to
fall in on themselves whenever they are newly put in and they have very little
in them. So I added tabs into my design so that it would hold a sack that had
handles in place and not collapse in on itself.
I also don’t like the size of most of the bags out there. So I made it
close to the size of most stores plastic sacks.
I hope this helps if anyone else who has the same frustrations
with trash sacks that fall into the container and tiny trash sacks that don’t
hold very much trash.
Click on the link if you want the free pattern I created
Instructions
If you are using brand new fabric then only follow the
number labeled steps.
If re-purposing clothes for fabric please follow the letter
steps and the number steps in the order laid out.
Step #A
Seam rip shirt apart, pull stray thread, pull apart for the
top layer of fabric. Seam rip pants apart, pull stray threads, pull apart pants
for lining layer of fabric. I don’t have interfacing so I am using denim from
jeans given to us for material for interfacing: I cut along seams with scissors.
I cut only along the inseams to allow for more joined fabric use.
Step# 1

Pin pattern pieces to fabric.
Step# C
Be sure to pin around paint, and frayed parts of former
shirt and pants.
Step#2
Cut pieces for top layer,
lining and interfacing.
Step#3
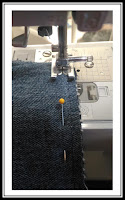
Pin interfacing to lining sew 1/8 seam for all fabric
pieces.* this step is optional, I just don’t like having things shift around
when sewing so this step makes it easier for me.
Step#4
Take front and back of lining trash sack, place bottom part
and place it in between.
Step#5
Iron all three pieces.
Step#6
Place bottom of bag piece bottom of the front of bag. Then
pin, then sew seam.
Do not iron the seam you just created.
Step#7
Place back of bag piece onto the bottom of bag piece then
pin.
Sew seam next. Do not iron the seam you just created.
Step#8
Place button hole tabs top outer layer on top of lining
fabric. Right sides together. Pin three sides. Leave one of the short sides
open. Sew the three sides. Cut off the two corners. Turn right side out. Iron
flat.
Step#9
Now sew button holes on button hole tabs. Seam rip open
holes carefully.
Step#10
Take button hole tabs and a ruler. Measure 6” down sides of
the front of the bag sides and 6” down sides of the back of the bag sides. Line
up the tow edges. Pin in place. Sew, make sure to back stitch.
Step#11
Place sides of bag piece on top of the bag piece for the front
part of the bag piece.
Pin together. Sew till the seam. Backstitch.
Step#12
Rotate just sewn part so the bottom of bag piece is matched
up to the bottom of side piece of the bag. Lining up the edges that are both
the bottom. Pin together. Sew together. Backstitch.
Step#13
Rotate again. Place last side of side of bag seam to match
up with the side of back of bag piece. Pin it. Sew together. Make sure to sew
up to edge of seams. Backstitch.
Step#14
Repeat steps 11-13 on the other side.
Steps#15

Turn right side out. Set aside.
Step#19
Take two strap pieces. Place right sides together. Pin along
the two long edges.
Sew both sides. Turn right side out. Press with an iron. Set
aside.
Step#20
Take strap tab parts, both the lining and the outer fabric. Place
right sides together. Pin along both long sides for both tabs. Sew along both
long sides of both tabs. Turn both tabs right side out. Press with iron.
Step#21
Slide strap tabs threw D rings. Pin at the bottom.
Sew along
bottom edge of both tabs. Make sure to back stitch.
Step#22
Pick up long strap. Zig-Zag both strap edges.
Step# D
I don’t have a slider so I am cutting out one strip of
plastic
from a back pack that broke beyond repair.
Step#23
Slide long strap threw slider and back around. Pin then sew.
Step#24
Slide D ring through strap and then put the strap back through
the slider.
Now slip the strap through the other D ring and pin. Sew seam then
set aside.
Step#25
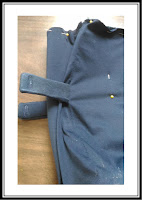
Pick back up the trash sack. Take tabs and fold tab over.
Put pin threw button hole to mark the middle of hole. Repeat this for this for
the other three tabs. Sew buttons on. Be sure to go through all the layers.
Step#26
Fold both outer layer and inner layer towards each other.
Insert the ends of the strap ends. Pin in place. Sew carefully through all the
layers as it will be very thick.
Cost Benefit Analysis
Between making the
Cloth Vehicle Trash Sack myself
and
buying it new
Tools
|
Price if new
|
Price we paid
|
Time to get new spent
|
Time to get we spent
|
Sewing machine
|
129.00
|
0.00 we already had it.
|
45 minutes
|
0 we already had it
|
Hand needle
|
1.00
|
0.00 we already had it.
|
45 minutes
|
0 we already had it
|
Sewing pins
|
4.10
|
0.00 already had it.
|
45 minutes
|
0 we already had it
|
Ruler
|
1.00
|
0.00 already had it.
|
45 minutes
|
0 we already had it
|
Seam ripper
|
1.49
|
0.00 already had it.
|
45 minutes
|
0 we already had it.
|
Scissors
|
1.00
|
0.00 already had it
|
45 minutes
|
0 we already had it
|
Printer
|
89.99
|
0.00 already had it
|
45 minutes
|
0 already had it
|
Iron
|
4.36
|
0.00 already had it
|
45 minutes
|
0 already had it
|
Ironing board
|
13.88
|
0.00 already had it
|
45 minutes
|
0 already had it
|
Paint brush
|
1.00
|
0.00 already had it
|
45 minutes
|
0 already had it
|
Dremel
|
28.99
|
0.00 already had it
|
45 minutes
|
0 already had it
|
Tape- for taping together the pattern
|
1.00
|
0.00 already had it
|
45 minutes
|
0 already ha it
|
Parts
|
||||
Shirt for top/outer fabric
|
1 ½ yards 5.98 athletic mesh knit
|
0.00 shirt that got paint on it.
|
1 hour
|
1 hour seam ripping
|
Pants for lining
|
1 ½ yards 2.98 for cotton
fabric
|
0.00 pants that were frayed at the bottom and outgrown
|
1 hour
|
30 minutes seam ripping
|
Pants for interfacing
|
1 ½ yards 4.42 for heavy interfacing
|
0.00 pants that were given to use for fabric use
|
1 hour
|
15 minutes cutting up
|
Blue thread
|
1.50
|
0.00 already had
|
45 minutes
|
0 already had
|
Strap Slider
|
.24
|
0.00 from a broken back pack
|
45 minutes
|
10 minutes cutting
|
2 D rings
|
.50
|
0.00 from broken backpack
|
45 minutes
|
2 minutes taking off backpack
|
Buttons
|
1.19
|
0.00 taken from frayed pants
|
45 minutes
|
5 minutes
|
Time to
Procure
|
||||
Cloth trash sack
|
7-10 days shipping from Etsy
|
2 hours and 2 minutes for parts + 8 hours sewing for a total =10
hours and 2 minutes
|
||
Price
|
17 .00 from Etsy is the closet to my design I found or 292.43 for
making your own if you had to buy all the tools and parts or if you just needed
to buy all the parts then it would cost 15.62
|
Paid 0.00
|
7-10 days shipping from Etsy
|
2 hours and 2 minutes for parts + 8 hours sewing for a total =10
hours and 2 minutes
|


No comments:
Post a Comment