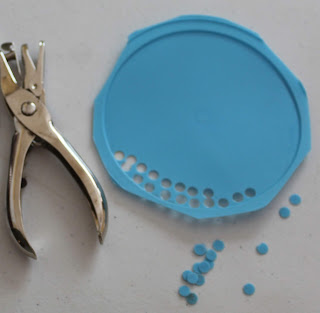
Polka Dot School Supplies Organizers from conditioner bottle
-
-
-
- Sand down edge to soften the sharpness of the edge with sandpaper or a nail file.
-
-
-
Polka Dot School Supplies Organizers from sour cream tub
-
Clean an empty sour cream tub and then put a layer of Mod Podge on the outside and press the paper onto it. It will have wrinkles but these wrinkles do not bother me since I like the texture. If having an almost organic texture to it will bother you then I wouldn't use a sour cream tub as it is difficult to get a flat surface and I don't like the look of painting it. I added three layers of paper.
-
-
Bride Pencil holder from conditioner bottle
-
Cut the top off and clean the bottle.
-
Cut down to the desired height.
-
-
Cut the top of the dress detail with scissors or an exacto knife.
-
-
Hot glue accents onto the container. You can put on whatever you want: lace, ribbon, polka dots, stripes, flowers or buttons etc. I used hot glue on the waist bow, then glued the faux hem ribbon on. Finally, I punched out holes to imitate buttons for the back of the dress and hot glued them on. I spread Mod Podge over the "buttons" to preserve.
Groom Pencil holder from shampoo bottle
-
Cut the top off a bottle and clean it.
-
Cut it down to desired height.
-
Sand down the edge to soften the sharpness of the edge with sandpaper or a nail file.
-
Sketch out the tux design on paper and cut out the template so you can check the proportions on the bottle. If it's wrong try again until you get the scale to look right. Then cut out around the design loosely so that you can fold it in half and cut it evenly (similar to cutting a paper heart). Trace the template on your plastic or paper and cut around the outside edge.
-
-
-
The genesis of this project comes from us needing a way to organize our office supplies. I tried the bottles for a number of months, in different heights, first with just tops cut off and cleaned. They didn't break and did a fair job containing our stationery so I mulled around in my mind if I could improve them. It occured to me that they were too tall to see their contents without dumping things out. Plus they were boring to look at. I experimented further with different heights and ways to attach decorations. The directions above are the best way I could find for waterproofing and preserving the decorations. Waterproofing is necessary if you have kids even if there is no way liquids"should" be anywhere near the pencils. I even tried it in our bathroom and they’re still just as I made them.
Clean an empty sour cream tub and then put a layer of Mod Podge on the outside and press the paper onto it. It will have wrinkles but these wrinkles do not bother me since I like the texture. If having an almost organic texture to it will bother you then I wouldn't use a sour cream tub as it is difficult to get a flat surface and I don't like the look of painting it. I added three layers of paper.
Cut the top off and clean the bottle.
Cut down to the desired height.
Cut the top of the dress detail with scissors or an exacto knife.
Hot glue accents onto the container. You can put on whatever you want: lace, ribbon, polka dots, stripes, flowers or buttons etc. I used hot glue on the waist bow, then glued the faux hem ribbon on. Finally, I punched out holes to imitate buttons for the back of the dress and hot glued them on. I spread Mod Podge over the "buttons" to preserve.
Cut the top off a bottle and clean it.
Cut it down to desired height.
Sand down the edge to soften the sharpness of the edge with sandpaper or a nail file.
Sketch out the tux design on paper and cut out the template so you can check the proportions on the bottle. If it's wrong try again until you get the scale to look right. Then cut out around the design loosely so that you can fold it in half and cut it evenly (similar to cutting a paper heart). Trace the template on your plastic or paper and cut around the outside edge.


No comments:
Post a Comment