Friday, May 1, 2020

DIY School Supplies Organizers

Polka Dot School Supplies Organizers from conditioner bottle


  1. Cut the top off the bottle, clean and remove labels.
  2. Cut down to the desired height.
  3. Trace with a bottle cap (I used chapstick) half of the circle onto the bottle with a dry erase marker or washable marker and cut out with scissors or an exacto knife. Clean off the marker after.
  4. Sand down edge to soften the sharpness of the edge with sandpaper or a nail file.

  5. Punch out holes with a hole punch in the center of the scallops.

  6. Punch out holes to glue onto the bottle and glue on with a glue stick. When all the dots are in the desired locations Mod Podge over the top of them.
  7. Hot glue on a ribbon below the scallops and glue the bow in place.

Polka Dot School Supplies Organizers from sour cream tub
  1. Clean an empty sour cream tub and then put a layer of Mod Podge on the outside and press the paper onto it. It will have wrinkles but these wrinkles do not bother me since I like the texture. If having an almost organic texture to it will bother you then I wouldn't use a sour cream tub as it is difficult to get a flat surface and I don't like the look of painting it. I added three layers of paper.
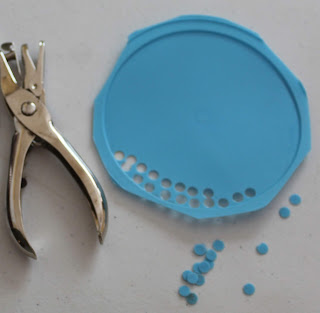
  2. Punch out holes with a hole punch and glue the dots with a glue stick. After you’ve glued on all the desired dots, Mod Podge over the top.
  3. Hot glue on a ribbon below the rim and glue the bow in place.

Bride Pencil holder from conditioner bottle
  1. Cut the top off and clean the bottle.
  2. Cut down to the desired height.
  3. Draw the top of the dress with a dry erase marker or a washable marker. 
  4. Cut the top of the dress detail with scissors or an exacto knife.
  5. Sand down the edge to soften the sharpness with sandpaper or a nail file.
  6. Hot glue accents onto the container. You can put on whatever you want: lace, ribbon, polka dots, stripes, flowers or buttons etc. I used hot glue on the waist bow, then glued the faux hem ribbon on. Finally, I punched out holes to imitate buttons for the back of the dress and hot glued them on. I spread Mod Podge over the "buttons" to preserve.

Groom Pencil holder from shampoo bottle
  1. Cut the top off a bottle and clean it.
  2. Cut it down to desired height.
  3. Sand down the edge to soften the sharpness of the edge with sandpaper or a nail file.
  4. Sketch out the tux design on paper and cut out the template so you can check the proportions on the bottle. If it's wrong try again until you get the scale to look right. Then cut out around the design loosely so that you can fold it in half and cut it evenly (similar to cutting a paper heart). Trace the template on your plastic or paper and cut around the outside edge.
  5. Fold over the edges of the lapels and trace the outline. Cut along the lapel line, giving you three pieces.
  6. Hot Glue the shirt and lapels leaving a small gap in between them to create the look of a jacket.
  7. With a permanent marker, draw the bow tie and any other details you want to add. Mod podge over the top of all the suit pieces and let dry.


The genesis of this project comes from us needing a way to organize our office supplies. I tried the bottles for a number of months, in different heights, first with just tops cut off and cleaned. They didn't break and did a fair job containing our stationery so I mulled around in my mind if I could improve them. It occured to me that they were too tall to see their contents  without dumping things out. Plus they were boring to look at. I experimented further with different heights and ways to attach decorations. The directions above are the best way I could find for waterproofing and preserving the decorations. Waterproofing is necessary if you have kids even if there is no way liquids"should" be anywhere near the pencils. I even tried it in our bathroom and they’re still just as I made them.

Wednesday, April 1, 2020

Printable Medical Mask Pattern


PDF Printable Medical Mask Pattern

Printable Medical Mask Pattern in Microsoft Word

Printable Medical Mask Pattern in Microsoft Publisher

Printable Medical Mask Pattern with Fabric ties that do not require cutting on the fold PDF

Printable medical Mask that does not require cutting on the fold in Excel


The left mask was exactly following the pattern, the right is eyeballed

I was NOT going to do a post about medical masks. There are so many skilled seamstresses that have posted YouTube videos on how to make them that I felt the need was met. However, when our family was preparing to sew some to donate I found that there was no printable pattern. Now some might argue that it is not necessary as measuring a 9" x 6" rectangle isn't that hard so a pattern is hardly necessary (especially if you know cutting techniques used when cutting out fabric for quilts).


We have varying levels of sewing skills in our house and I wanted everyone to be able to participate in some way. For example, some of my kids are more suited to pinning a paper pattern to fabric than using a ruler multiple times and cutting with precision or using a rotary cutter, which is dangerous for even some adults.:) Others are more suited to cutting rather than sewing as they have a lead foot with the pedal. This is something every seamstress eventually overcomes as we have learned how to sew but that takes time. Additionally the seam allowance in the directions for our local hospital is a 1/4" seam allowance which again is not a big deal but it might be hard for someone new to sewing.


Then you have my wonderful husband who's a perfectionist and I knew he would want to know exactly where and how much to fold. All the videos say pinch about this much and I knew he would not be comfortable with such vague measurements like I would. He can sew a straight line and turn corners but folds or tucks as everyone is calling them or pleats if you were sewing something else is a brand new concept, compounded with the small amount of fabric that is being folded or pleated made me concerned for my families ability to help without getting overwhelmed or easily frustrated.

I ended up creating  a printable pattern in several different formats to share in case someone else was wanting to help with the need for masks but needed something exact to print out and follow. I generated different formats to attempt to make the pattern usable for most computer setups. I've heard so many arguments about which programs make the best patterns and print more accurately. I don't want to get into those arguments, so I posted several formats and hopefully one of them will help and you can find a program that suits your personal preference.

I feel there are so many good video tutorials to follow so I didn't make my own but created the pattern for something to cut and follow. Search YouTube for a medical mask tutorial and find one that fits your speed if you need a little walk through. Make sure you check with your hospital of choice for factors like preferred elastic width if you have elastic on hand or are able to get your hands on any.

Monday, March 2, 2020

Heart Coloring Page


When I was a child my parents got me coloring books for Christmas. I would pull out my crayons and later my colored pencils. Then there was not enough detail in the background of the coloring page and I would add more details: some grass, trees, clouds or a sunset in the background. Eventually my parents got me sketch books so I could come up with my own drawings.  

I wanted to to see if I could make a coloring page and I was surprised at how hard it was to color a good picture. It was very easy when I added the ink for the lines to look wrong. Or after I had inked it all in, I taped it on the wall to study as I was walking through the room and sure enough a couple of days later I realized there was something wrong again. So I would start another drawing trying to correct the errors and make more changes. I am still not 100% satisfied with the look of this heart drawing I finished but it was a neat experience to try what other artists do, creating lined art for someone else to color in.

Here is the link for a Free Heart Coloring Page
Heart Coloring Page

Saturday, February 1, 2020

Replacing a coat zipper

Why replace a zipper instead of just buying a new coat?


Before                                                                                           After


Before                                                                                         After


Its cheaper, you have sentimental attachment to the coat, or you cant find another coat like it.

Step#1


Seam rip the old zipper out. To do this carefully pull on both sides of the fabric around the zipper so that the seams are clearly visible. Now carefully slide the tip of the seam ripper underneath the seam and rock it up and break the thread. Repeat this step until all the thread attaching the zipper to the coat is removed. Then remove the loose threads to clean it up.

I have noticed that on the coats I replaced the zippers on there was not just one seam to remove to take the zipper out, there were three seams. Take special care when removing the seams so that you don't accidentally rip a hole in the coat. You could rip the zipper out in under five minutes but it is not worth ruining the coat to remove the zipper quickly. So please take your time and remove the zipper carefully, you will be glad you did.

Step#2

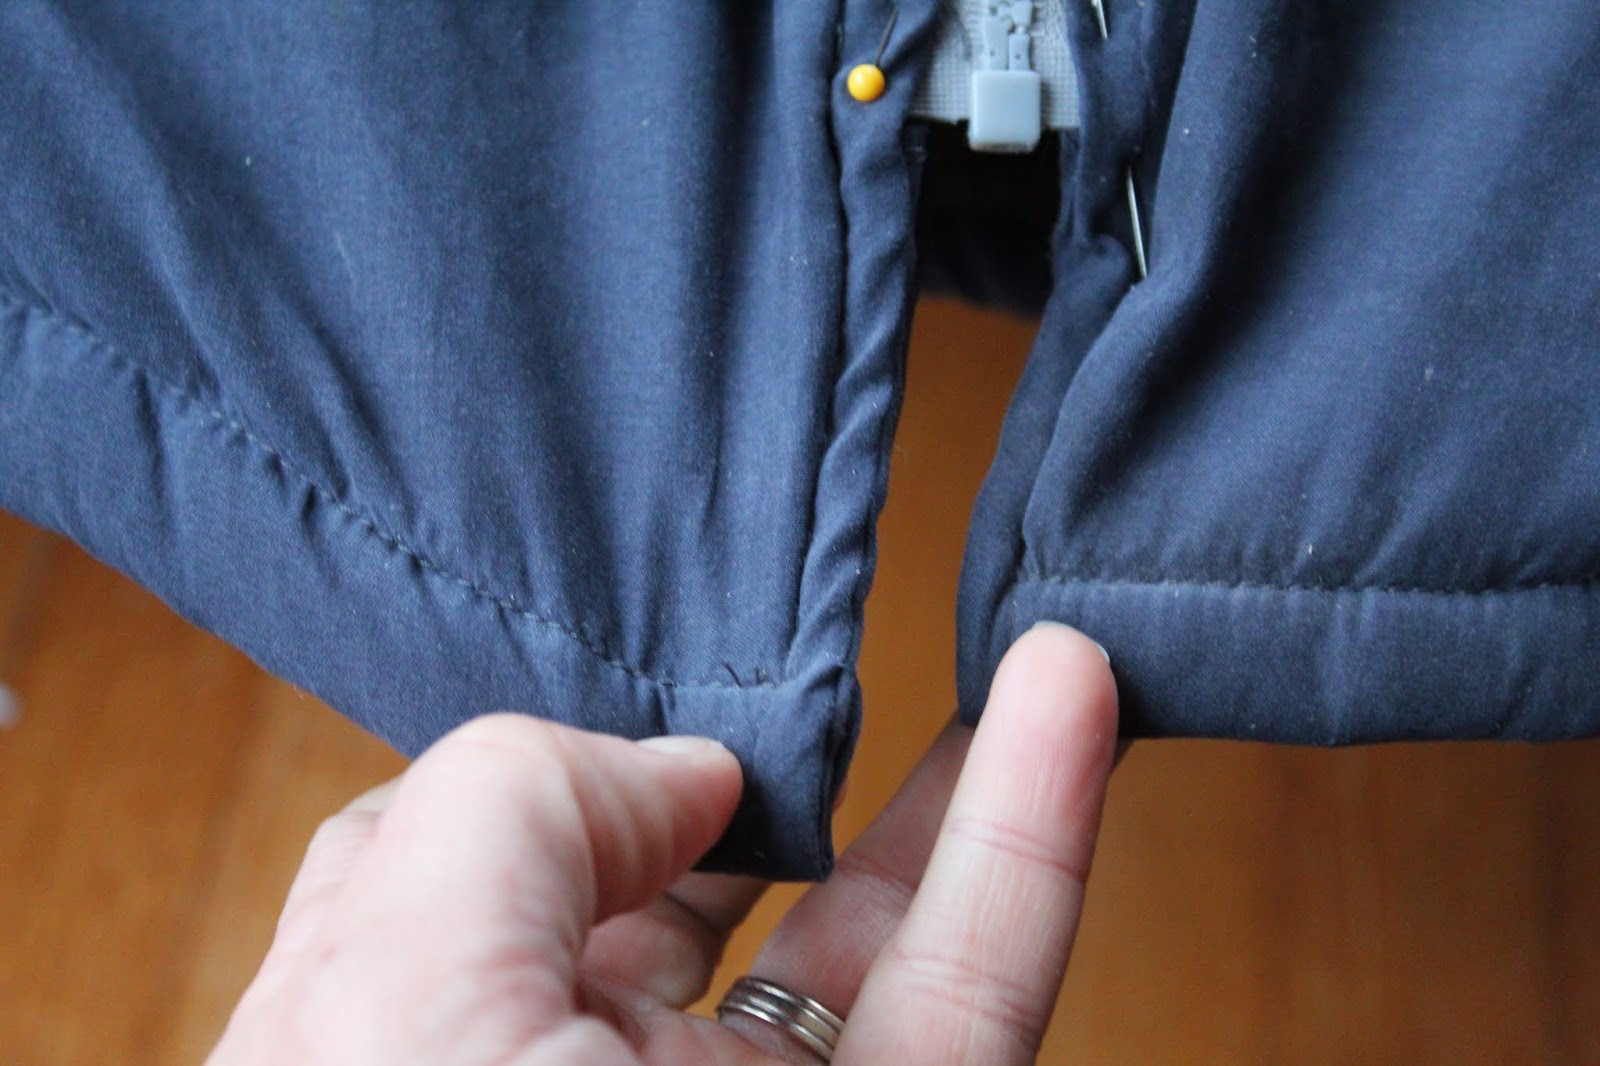
Take the new zipper and unzip it all the way so that there are two separate pieces. Place the zipper in between the pieces of fabric then pin it in place.


Take note of the extra blank space at the top of the zipper. This extra blank part of the zipper is intended to make it easier to finish off the zipper inside of the coat smoothly rather than leaving a square edge that would easily snag on things like your skin or clothes.


 I would also recommend making sure that the bottom edges of the coat lines up evenly so that you are not warping the drape and shape of the coat. Just because the zipper lines up doesn't mean the coat lines up properly. I learned this the hard way and thankfully had not sew the new zipper in yet. In hind site I would have added a pin at the top and bottom where the original zipper was on both sides of the coat so I could get the placement perfect the first time.

Step#3


Lower your presser foot and hand crank in your first stitch. Stitch in 4-5 stitches and then back stitch. Sew slowly making sure to put your stitches where they were in the original zipper, as long as there was no damage to the fabric that would prevent it from being secured firmly to the zipper. Be sure to Back-stitch along the bottom as well, that part of the coat will have a lot of tugging and yanking so it will need to be reinforced well.

Do you have to use a zipper foot. My answer is NO, you don't to. I have tried it and it can be done without one if you don't have one but I will say when I tried it I had to go even slower to make sure I didn't break my machine needle.That said, it is a lot easier with a zipper foot so if you have one I would use it. Regardless of whether you use a zipper foot or not take your time and sew slowly through all the layers.

Make sure to use the previous places where the zipper was sewn in,  you should see the previous seam lines on the fabric. To get in the right mind set, think "stitch in the ditch" technique.

Also keep in mind you may need more than one seam to secure it like it was previously.  For one of the coat zippers I replaced I had to sew in 3 different seams to re-assemble it . Try your best to replicate what the original seamstress did and don't forget those back-stitches.


It took me about 30 minutes to do the whole thing: remove the old zipper, pull out the loose threads and put in the new one. For me replacing the zipper made so much more financial sense then buying a new coat and when it was done I felt good that I could preserve the coats my kids love and still fit for them to wear a little longer.

Wednesday, January 1, 2020

Alternative Free Bean Bag Stuffing


When your child has sensory needs trying to figure out what chair will help them be comfortable enough to sit can be a challenge. We've tried a number of types of chairs trying to figure out what works for our kids. We tried camp chairs, mushroom chairs, bungee chairs, stools, plastic lawn chairs, wooden benches, plastic benches, computer chairs, wood ladder back chairs, leather couches, antique couches, micro fiber couches, metal folding chairs, exercise balls, and bean bags.

After a lot of experimenting for our kids the chair with the best results was the bean bag chair.Bean bags are very comfortable to sit in, wonderful for kids with sensory needs and just fun to sit in. They do, however, come with some downsides. They deflate fairly quickly when you have kids who like to run and jump into them.

We have in the past bought refills for the bean bags. However, when you refill the bags the beads go everywhere and it takes forever to get it cleaned up. In addition, it costs almost as much to buy the refills as it does to buy a new bag. It's frustrating to have to choose between buying a new bag every year or dealing with the mess of refilling the bag. We could just not have the bean bags and just avoid the issue all together. However, the way a bean bag gives sensory input is great for our kids needs ... especially when they are overloaded.
bead mess

So what do you do when your kids have loved another chair till it was like a flat pancake and you don't have the money for a new bag or for the refill??? You look for another way to refill the bean bag. I read other blogs and watched YouTube videos and couldn't find any solutions that didn't cost money.

Finally, one day I was watching a video on alternative pillow stuffing and I saw someone stuff a pillow with plastic sacks. I thought, well I have plenty of those but will it be comfortable and will it make a noise that bothers their senses? So one day I added some plastic bags to her chair and had her sit on them and there were no sensory problems. 

I spent six months filling that bean bag with plastic sacks after shopping and she loved that she could keep using her bean bag. In the mean time, I was thinking about how badly the bag needed to be washed. In the past this was not an option because who wants to dump out all those beads to clean something that will probably need washed again the next day because she does almost everything in that chair. Then it occurred to me that most of the chair was plastic sacks not beads. So I emptied what was left of the beads and bags out, mess and all and washed her bean bag.  It took 8 hours to get all the beads off the plastic sacks I had stuffed in her chair and now I feel good that I will never have to mess with the beads again because I threw the beads away. I can just keep stuffing her chair with bags and when I need to wash her chair it will take no time at all to empty out the sacks, wash it and re-stuff it. All for free. So if you have the patience to wait and stuff in your left over grocery sacks you can re-stuff your bean bag for free. The only thing I would have done differently was to have emptied out the beads at the beginning instead of having to get the beads off the plastic sacks later.


BEFORE                                                                                           AFTER